
This guide shows you how to make your own floggers at home, from a very simple beginner rope version all the way up to more advanced paracord and leather designs.
Why? Because a lot of people get into making their own because it’s way cheaper than buying one, and you can experiment with different sensations, lengths, and weights without spending a lot of money. It also lets you build exactly what you want instead of settling for whatever is available in shops.
So, whether you want something soft and gentle, nicely balanced, or heavy and thuddy, this guide covers the materials, tools, design choices, step-by-step instructions, customization, testing, and maintenance you need.
Table of Contents
- TL;DR
- Benefits of Homemade BDSM Floggers
- Quick Safety Notes for Building and Using DIY Floggers
- BDSM Flogger Material Options
- Core Tools & Supplies
- How to Choose the Right DIY Flogger Design
- Simple DIY Rope Flogger Tutorial with Double Overhand Knots
- Customizing a Homemade Flogger: Handles, Knots, Decorative Touches
- Testing Your DIY Flogger: How to Check Balance, Swing & Safety Before Use
- How to Maintain and Clean Your Homemade BDSM Flogger
- FAQs About How to Make a DIY Flogger
- Final Thoughts
- Want More DIY Reads?
TL;DR
- Making your own flogger saves 70–85% compared to buying one while giving you full customization.
- Always use body-safe synthetics (nylon, MFP, paracord, biothane) for easy cleaning and safety.
- More falls = thuddier | Fewer falls = stingier. Most beginners start with 13–24 falls.
- Ideal size: 6–8″ handle + 16–24″ falls.
- The simplest and best beginner project is the rope flogger with double overhand knots — cheap, fast, and effective.
- Test every flogger thoroughly on a pillow before using it on a partner.
- Proper handle wrapping (over a folded bundle) is the key to safety and durability.
- You can customize with decorative knots, mixed materials, weighted ends, and different textures.
- Materials, fall count, width, and treatment dramatically change the sensation (soft thud → sharp sting → heavy impact).
- With basic tools and $15–40 you can build a flogger that performs as well as $150+ commercial ones.
Benefits of Homemade BDSM Floggers
Why make your own DIY flogger? Because it’s one of the smartest and most rewarding ways to enter the world of impact play. Whether you’re searching for a homemade BDSM flogger, a paracord flogger DIY, a rope flogger tutorial, or a custom leather flogger, building it yourself delivers benefits you simply can’t get from off-the-shelf toys.
- Full customization: Create a flogger that matches your aesthetic, favorite colors, or partner’s preferences. Add decorative elements that reflect your style.
- Perfect for testing sensations: Not sure if you prefer thuddy or stingy? Build a simple version first, test it, then refine. This is far cheaper and more educational than buying multiple expensive floggers.
- Learning a valuable skill: Once you master basic rope or paracord floggers, you can progress to advanced braided designs, leather versions, or hybrid tools.
- Hygiene and control: You control the materials completely. Choose easy-to-clean synthetics and know exactly what touches your (or your partner’s) skin.
- Sense of accomplishment: There’s something deeply satisfying about swinging a flogger you built yourself.
- Significant cost savings: A high-quality commercial flogger can easily cost $80–$300+. You can build a professional-grade DIY flogger for $10–$45 using rope, paracord, leather scraps, or biothane.
DIY Flogger Cost Breakdown: How Much You’ll Actually Save
| Item | Budget DIY Cost | Mid-Range DIY | Store-Bought Equivalent |
|---|---|---|---|
| Simple Rope Flogger (14 falls) | $12–18 | $25–35 | $80–150 |
| Paracord Flogger (24–36 falls) | $15–25 | $30–45 | $120–250 |
| Leather Flogger | $25–40 | $50–80 | $150–350 |
| Custom/Hybrid Flogger | $20–50 | $60–100 | $200–400+ |
Most builders save 70–85% compared to commercial floggers while getting better customization.
Quick Safety Notes for Building and Using DIY Floggers
Safety comes first when building and playing with any homemade BDSM flogger!
Use only body-safe, non-toxic materials. Synthetics such as nylon, MFP, paracord, or biothane are washable and do not absorb bodily fluids. Remember that natural fibers like jute might fray and may absorb bodily fluids (and are something you shouldn’t share across partners if possible. Always melt or knot the ends of synthetic rope and cord securely.
Test thoroughly before using on a partner: swing your finished DIY flogger against a pillow, couch cushion, or your own thigh to check balance, fall length, and impact feel. Adjust as needed.
NOTE: This article focuses purely on construction. For full safety practices, including Risk-Aware Consensual Kink (RACK) principles, negotiation, safe words, target zones, and aftercare, see our dedicated guides:
→ [Ultimate BDSM Aftercare Kit]
→ [Yes/No/Maybe BDSM Aftercare Kit]
→ [Safe Word Basics]
BDSM Flogger Material Options
Soft & Sensory Materials (Gentle, Warm-Up, Sensory Exploration)
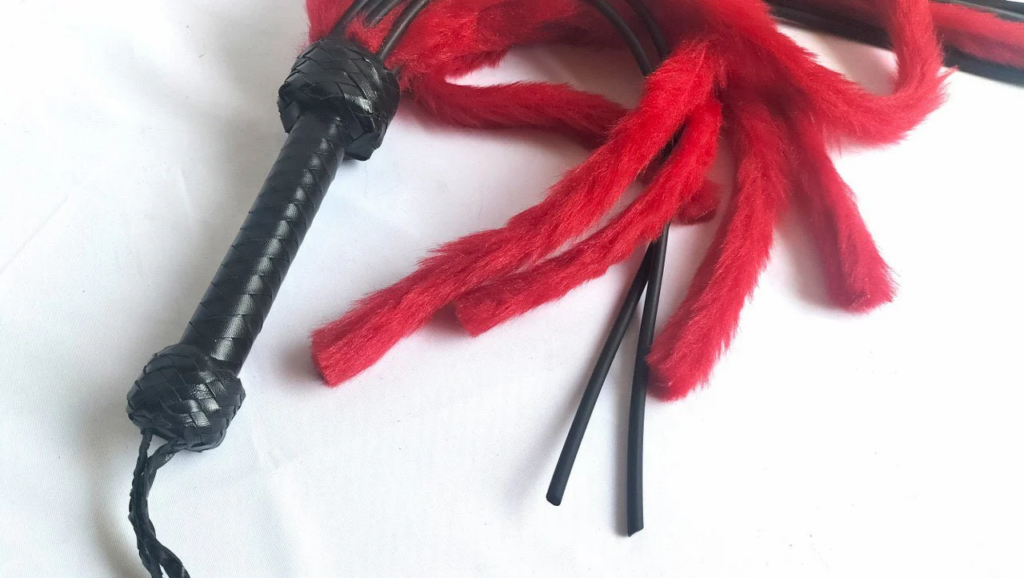
- Rabbit or Faux Fur Strips: Ultra-soft texture used for pure sensory play, tickling, and light brushing with minimal to zero impact.
- Feather Falls: Weightless, fluttering sensation that stimulates surface nerves with a ticklish, electric touch and no real impact.
- Mylar or Tinsel Strips: Crinkly, metallic material that creates a light “fizzing” sensation and sharp auditory feedback with almost no weight.
- Silk or Satin Ribbons: Cool, slippery falls that glide smoothly over the skin for a non-impact, caressing sensation.
- Fully Conditioned & Unfurled Hemp: Boiled, shattered, and oiled hemp that becomes soft and mop-like, delivering a heavy but gentle sweeping feel with no sting.
- Cotton Rope or Fabric Strips: Very lightweight material with almost no sting or thud, perfect for super-gentle beginner
- Microfiber Strips: Thin, flexible synthetic that delivers very light impact with a soft, hugging feel.
play.
Light Impact (Beginner-Friendly)
- Soft Nylon (Unbraided or Frayed): Light, diffused sting that can be further softened by unraveling the strands into a cloud of gentle contact points.
- Microfiber Strips: Thin, flexible synthetic that delivers very light impact with a soft, hugging feel.
- Thick Soft Paracord (High Fall Count): When used in large numbers of falls (30+), it creates a mild, balanced impact that is easy for beginners to control.
- Gutted Paracord: Paracord with the inner strands removed, making it much softer and lighter with a gentle thud-sting mix.
- 1/4″ Nylon or MFP Rope (High Fall Count): Slightly thicker than standard string but still light; excellent for beginners when cut into 20–40 falls.
- Soft Polypropylene Rope (MFP): Lightweight, flexible, and inexpensive synthetic that gives a soft, forgiving impact with minimal sting.
- Braided Accessory Cord (3–5mm): Smaller diameter cord used in higher quantities, producing a mild, playful sensation that is easy to swing and control.
Thuddy Materials (Deep, Heavy, Warm Impact, Great for Bruising/Massaging)
- Biothane (Heavy Weight): Dense vegan material that delivers a consistent, heavy thump with excellent weight and minimal surface sting.
- Thick Rubber Tubing or Koosh Style: High-density rubber that produces a bouncy, deep thuddy impact with very little sting.
- Neoprene: Spongy, dense synthetic that gives a heavy, “wet” thud and strong resonant impact.
- Thick Paracord (Bundled, 40+ Falls): Large volume of strands that moves air and lands with substantial weight and deep thud.
Stingy Materials (Sharp, Biting, Intense, More Surface Pain)
- Paracord 550 (Single Strands with Burnt Tips): Classic stingy option where the hard melted tips create sharp, biting impact that increases with fewer falls.
- Thin Nylon Rope: Sharp, crisp sting that can be amplified by knots or raw ends.
- Silicone Strands: Denser than most synthetics and very “grippy”; delivers a heavy sting that creates localized surface heat and red marks.
- PVC or Vinyl Strips: Stiff plastic-based material that produces a hot, slappy sting on the skin.
- Kevlar or Rough Synthetic Cords: Scratchy, intense sting with a unique hot, abrasive texture.
Advanced + Extreme Materials (Intense, High-Impact, Experienced Users Only)
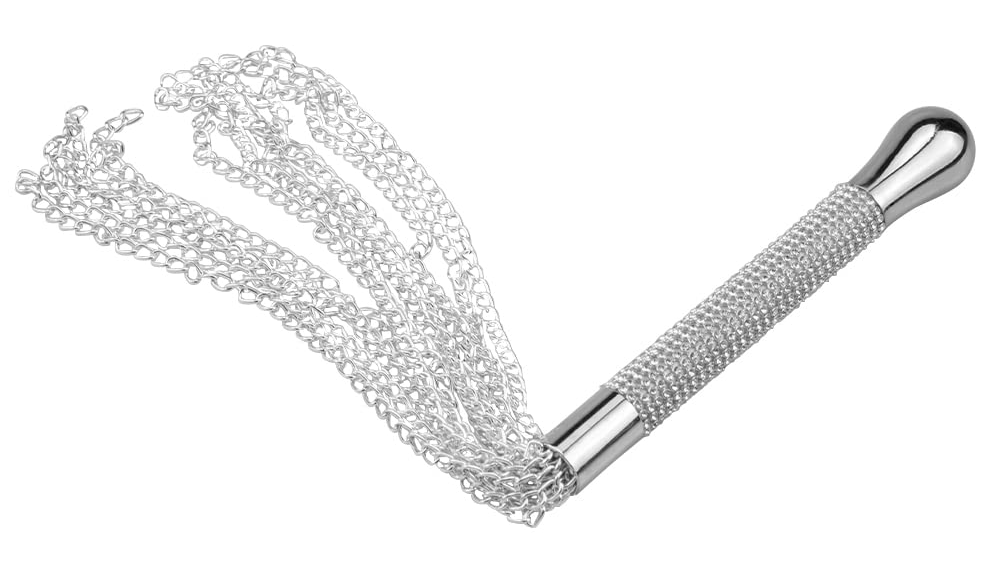
- Metal Chain (Small Link or Ball Chain): Non-compressing material that delivers devastating heavy impact with a cold, rattling sting.
- Knotted Nylon (“The Wasp”): Each knot acts as a focal point for intense, piercing pain and concentrated impact.
- Raw / Untreated Jute or Hemp: Hairy natural fibers that create a scratchy, micro-abrasive bite and lingering hot sensation.
- Fiberglass or Rigid Plastic Rods: Extremely stiff material that transfers force like a solid impact tool with almost no flex.
Mixed & Creative Materials (For Unique Sensations)
- Combination floggers: Mix materials in one flogger (e.g., leather + chain, suede + paracord, fur + rubber) for varied sensations in a single tool.
- Plastic string/shoelaces/PVC cord: Budget options. PVC gives a unique sting; plastic can be very light/stingy.
- Faux leather / vegan options: Biothane, PU leather, or vinyl strips – durable, cleanable, and versatile.
- Textured additions: Add knots (double overhand), crackers (small weighted ends), or frayed ends for hybrid sensations.
Leather Options + Tanning Outcomes
Leather is one of the most popular and versatile materials for floggers, but the final sensation depends heavily on three factors: the animal source, how it is tanned and treated, and how the falls are cut (width and thickness). Below is a breakdown of the most common leathers and treatments.
Deerskin / Elk / Moose Leather Extremely soft, supple, and flexible with loose natural fibers. When chrome-tanned and lightly oiled, it delivers a caressing, massage-like thud with very little sting. Ideal for sensual play and beginners. Best cut into medium-to-wide falls (½”–1″).
Garment Suede (Cow or Goat) Velvety, fuzzy texture that creates gentle warmth and a soft thud. The suede side adds a slight “grabby” friction that feels like a warm rub. Excellent for light-to-moderate thud; avoid very narrow cuts if you want to keep it gentle.
Cowhide (Standard) The most common and versatile leather. Can range from soft to firm depending on treatment.
- Chrome-tanned + oiled = good balanced thud.
- Veg-tanned / Latigo = stiffer and stingier.
Bullhide / Buffalo Leather Thicker, heavier, and denser than regular cowhide. Produces a deep, resonant thud with more mass and impact. Often used for heavy, thuddy floggers that can cause bruising. Best with wide falls (1″+) and oil-tanned finishes.
Remember: If you don’t want real lether there are a tone f synethic options outthere
Kangaroo Leather Extremely strong and dense fiber structure. Can be cut very thin while remaining durable. When veg-tanned or left firm, it creates a sharp, snappy sting. Popular for precise, stingy floggers and cat o’ nine styles.
Latigo Leather Oil-tanned but deliberately stiff and dense. One of the stingiest common leathers — it has a hard “snap” and concentrates energy at the tips. Narrow cuts (¼” or less) make it intensely biting.
Oil-Tanned Leather (Various Animals) Heavy oils and waxes are added during tanning. Makes the leather floppy, heavy, and thuddy. Reduces sting and increases that deep “pushing” sensation. Great for wide-cut thuddy floggers.
Vegetable-Tanned (Veg-Tan) Leather Stiffer and more rigid due to natural bark tannins. Produces more sting and a crisp impact. Often used for structured, punishment-oriented floggers.
Rawhide Untanned or minimally processed leather that is hard, stiff, and plastic-like. Delivers intense, rod-like impact with almost no flex. Extreme/punishing only
Flogger Leathers at Glance
| Leather Type | Typical Sensation | Best For | Notes |
|---|---|---|---|
| Deer / Elk / Moose | Soft caressing thud, very low sting | Beginners, sensual play, warm-up | Extremely supple and forgiving. |
| Garment Suede (Cow/Goat) | Gentle velvety thud with light friction | Light thud, skin warming | Fuzzy texture adds pleasant warmth. |
| Cowhide | Balanced thud | All-purpose, everyday use | Most versatile and affordable option. |
| Bullhide / Buffalo | Deep, heavy resonant thud | Heavy thud, bruising play | Naturally thick and weighty. |
| Kangaroo | Sharp, snappy sting | Precision sting, cat o’ nine | Very strong even in thin cuts. |
| Latigo | Strong biting sting, crisp snap | Intense sting, punishment | One of the stingiest common leathers. |
| Oil-Tanned Leather | Heavy, floppy, deep thud | Thuddy floggers | Soft and heavy feel. |
| Vegetable-Tanned | Stiff, crisp sting | Structured, sting-heavy | More rigid leather. |
| Rawhide | Hard, rod-like impact | Extreme punishment only | Very stiff with almost no flex. |
Core Tools & Supplies
- Rope, paracord, leather strips, biothane, or other fall material (see “Best Materials” section)
- Metal D-ring, O-ring, or wooden/metal loop (1–2 inch diameter)
- Wrapping material for the handle: electrical tape, thin paracord inner strands, sinew, waxed thread, or narrow leather strips
- Scissors or sharp knife
- Lighter (for synthetic rope/paracord to melt and seal ends)
- Measuring tape or ruler
- Optional but recommended: fabric glue or textile adhesive for extra security on knots and wraps
Nice-to-have upgrades:
- Wooden dowel or metal rod (for internal core stiffness)
- Rotary cutter and cutting mat (for leather or wide strips)
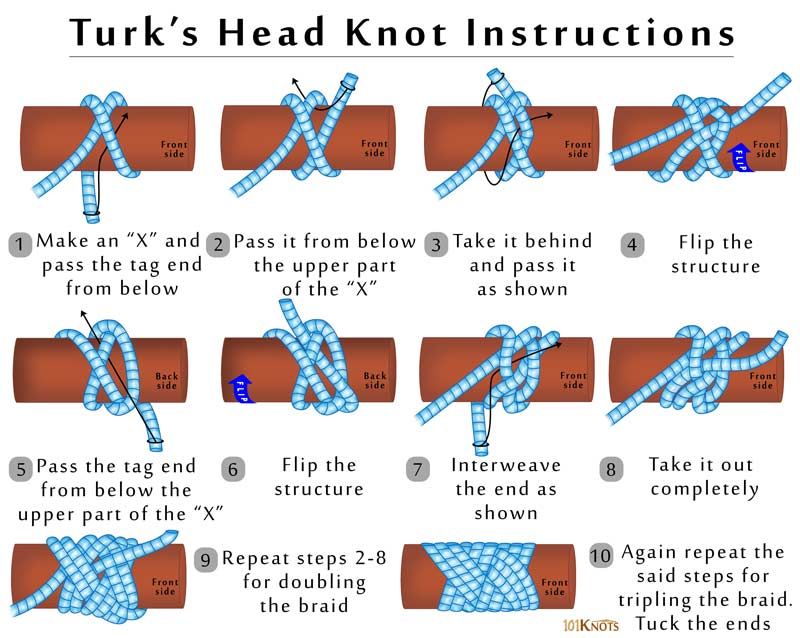
- Paracord fid or lacing needle (for decorative braiding or Turk’s head knots)
- Hair dryer or heat gun (to straighten curly PVC or nylon)
- Sandpaper (to smooth wooden dowels)
Budget vs. Premium Toolkits
| Level | Total Cost | What You Get | Best For |
|---|---|---|---|
| Budget | $8–20 | Basic rope/paracord, electrical tape, lighter, scissors, D-ring from hardware store | First-time builders, testing ideas |
| Mid-range | $25–45 | Quality nylon/MFP rope, inner paracord for wrapping, fabric glue, dowel, measuring tools | Most popular DIY floggers |
| Premium | $60–120 | Top-grade leather or biothane, professional fid set, beeswax, rotary tools, multiple rings | Advanced braided or leather floggers |
With just the budget kit you can already build a professional-feeling rope flogger or paracord flogger. The tools above cover 95 % of all DIY flogger projects – from the simple double-overhand-knot rope version to more advanced braided or leather designs.
Make your own flogger if you want lower cost, full customization, and the ability to test sensations before buying expensive gear. It also gives you a personal connection and lets you choose easy-to-clean materials. Buy a professional flogger when you want premium leathers, perfect balance and craftsmanship, or specialized designs like heavy chain or extreme impact tools. Many people start with a homemade BDSM flogger and later upgrade to store-bought pieces. Both options are valid depending on your budget and goals.
How to Choose the Right DIY Flogger Design
Choosing the right DIY flogger design is one of the most important steps before you start building. The number of falls, total length, and handle style all dramatically change how the flogger feels — from a soft sensual thud to a sharp sting or heavy impact. Here’s exactly what you need to consider…
More falls = Thuddier sensation (deep, warm, broad impact that feels more like a massage and spreads the force)
Fewer falls = Stingier sensation (sharp, biting, focused sting that lands with more intensity on a smaller area)
7–12 falls: Very stingy and targeted — great for sharper play
13–24 falls: Balanced thud and sting — the most popular range for beginners
25–50+ falls: Heavy thud with broad coverage — feels heavier and more thumpy
Handle length: Most people prefer 6–8 inches. This fits comfortably in your hand and gives good control.
Fall length: 16–24 inches is ideal for most users. It gives enough swing room without needing a huge play space.
Total flogger length = Handle length + Fall length.
Desired fall length × 2 + 6–8 inches extra = length of each piece you cut. (Example: For 18″ falls and a 7″ handle, cut each rope piece 43–44 inches long, then fold in half.)
Beginner vs. Advanced Designs
- Beginner-friendly: Simple rope flogger with double overhand knots, 12–20 falls, 7″ handle, and no internal core. Quick to build (under 1 hour).
- Paracord flogger with braided or wrapped handle and decorative knots, 24–36 falls.
- Advanced: Leather flogger with rolled handle and wooden core, multi-material hybrids, or floggers with weighted falls and crackers.
Recommendation: If this is your first homemade BDSM flogger, start with a simple rope design. Once you test it, you’ll know exactly what to adjust for your next build.
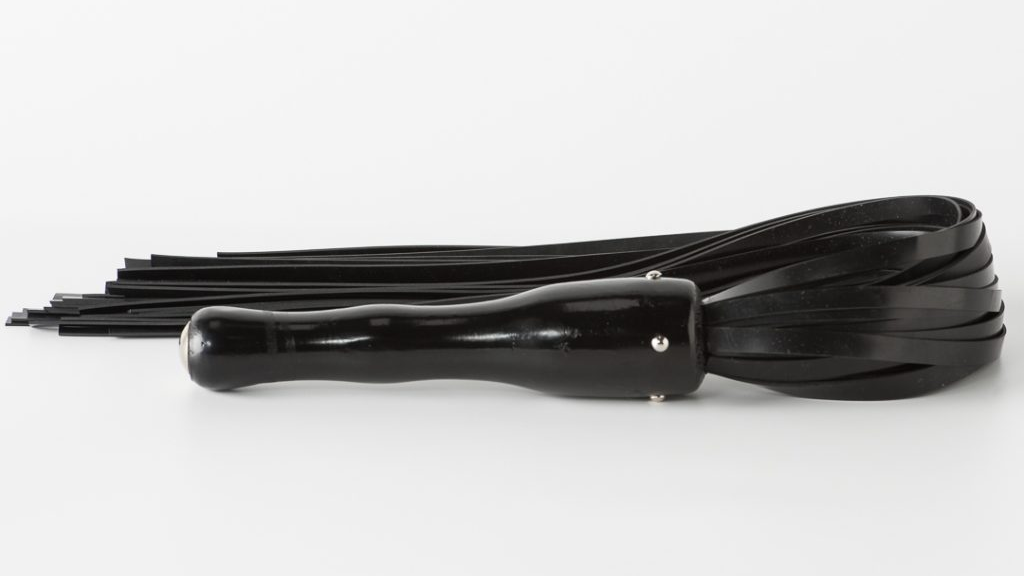
Simple DIY Rope Flogger Tutorial with Double Overhand Knots
This is the easiest and most beginner-friendly DIY rope flogger you can make. It uses nothing but double overhand knots and a few wraps — exactly as described in the classic tutorial you shared. The result is a sturdy, weighted flogger that feels professional and costs under $20.
- Finished size: Approximately 25 inches total (7-inch handle + 18-inch falls)
- Recommended rope: 3/8″ (8 mm) or thicker soft synthetic nylon or MFP (multi-filament polypropylene). Avoid natural fibers and scratchy poly-pro.
Materials (Exact Quantities)
- Three pieces of 3/8″ rope, each 60 inches long
- One piece of 3/8″ rope, 130 inches long
- One metal D-ring or O-ring (1–1.5 inch diameter)
- Electrical tape, thin paracord, or inner strands for handle wrapping
- Scissors or knife
- Lighter (for melting ends)
- Total falls: 14 (you can easily adjust up or down)
Step-by-Step Instructions
- Cut and prepare the rope: Cut your pieces to the lengths above.
- Bundle and fold over the ring: Lay all four pieces together and slide the D-ring to the exact center of the bundle. Fold the entire bundle in half so the ring sits at the top U-bend. You now have 14 falls hanging down.
- Form the handle: Starting right below the D-ring, wrap the doubled section tightly with electrical tape or paracord inner strands. Work your way down for 7 inches to create the handle. Keep tension high — this is what locks everything securely in place.
- Finish the falls with double overhand knots: At the end of each fall, tie a simple double overhand knot (pass the end through the loop twice before tightening). This adds a little extra weight and prevents fraying.
- Trim and seal: Trim all falls perfectly even. Melt the very tips of the knots with a lighter (just enough to seal — don’t burn the rope).
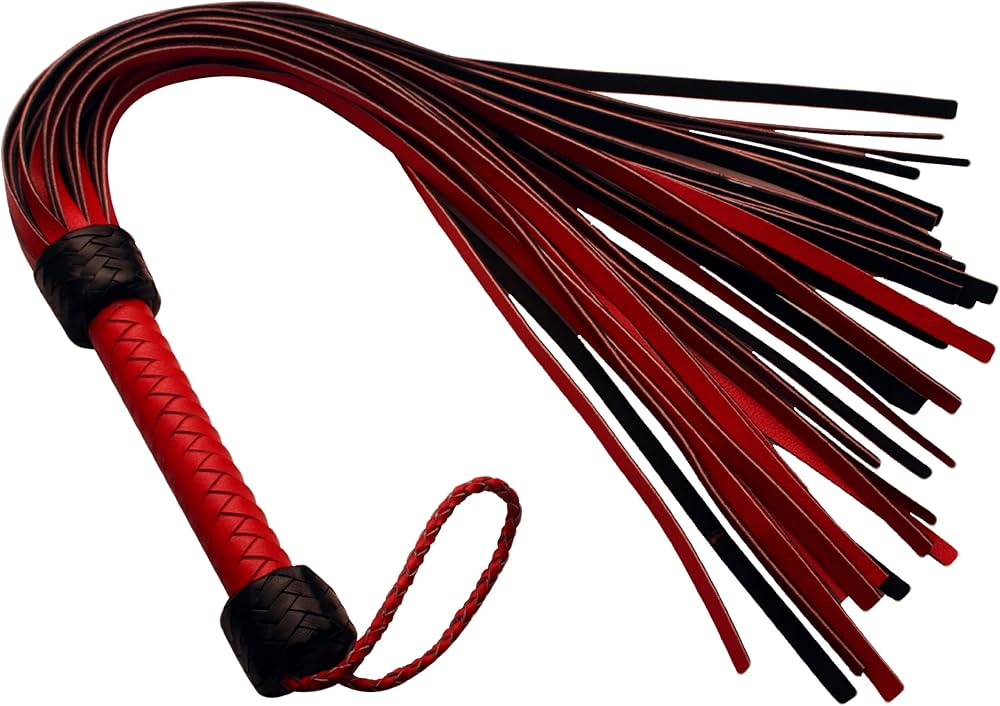
Customizing a Homemade Flogger: Handles, Knots, Decorative Touches
Once you’ve built your basic DIY flogger, the real fun begins with customization. This is where your homemade BDSM flogger becomes truly unique and perfectly suited to your style and sensations.
Advanced Knots and Decorative Techniques
- Turk’s Head Knots: Wrap these around the top or bottom of the handle for a beautiful, professional look. Use 3-lead or 5-lead versions in one or two colors.
- Spanish Ring Knot: Excellent for covering the base of the handle where the falls begin — adds grip and a polished finish.
- Half-Hitch or Constrictor Knots: Great for securing wraps tightly without slipping.
- Gaucho Knots or Pineapple Knots: More advanced options for a textured, eye-catching handle.
Braiding Patterns and Color Mixing
- Try herringbone, diamond, or round plait patterns using paracord or thin leather strips over the handle core.
- Mix colors (e.g., black + red, purple + silver) for stunning visual contrast.
- Create multi-tone falls by using different colored ropes in the same bundle.
Adding Weight, Texture, and Functionality
- Crackers or weighted ends: Tie small knots or add metal beads at the tips of a few falls for extra impact and a satisfying “snap.”
- Multi-texture falls: Mix materials in one flogger — soft suede with paracord, fur strips with leather, or rubber with nylon.
- Ergonomic handles: Add a wooden dowel core or build up the wrap thicker in the palm area for better grip and reduced fatigue.
- Hanging loop options: Leave a small loop of cord at the top of the handle or attach an extra D-ring for easy storage.
These custom touches turn a simple rope flogger into a personalized work of art that performs exactly how you want.
Finishing Touches: Sealing Ends, Preventing Fraying & Making Falls Even
Proper finishing makes your DIY flogger look professional, last longer, and stay safe to use.
- Sealing synthetic ends: Use a lighter to carefully melt the tips of nylon, paracord, or MFP falls. This prevents fraying and creates neat, slightly weighted ends.
- Double overhand knots: Tie these at the end of each fall for added weight, extra sting, and natural fray prevention.
- Trimming for even falls: Lay the flogger on a flat surface and cut all falls to exactly the same length with sharp scissors or a rotary cutter.
- Waxing or conditioning: For leather or biothane floggers, apply a light coat of beeswax or leather conditioner to protect the material and improve flexibility. For rope floggers, you can lightly wax the handle for a smoother grip.
Take your time with these steps — they separate amateur-looking builds from high-quality homemade floggers.
Testing Your DIY Flogger: How to Check Balance, Swing & Safety Before Use
Never use a new homemade BDSM flogger on a partner without thorough testing first.
Take your finished flogger and spend time practicing on a pillow or folded blanket. Swing it using figure-8 patterns as well as straight strokes to evaluate the balance and see exactly how the falls land. Test different distances – swinging closer to the target gives you more control, while swinging from farther away increases speed and impact. Hit the surface at varying intensities so you can clearly feel whether the flogger produces more of a thud or a sting. Pay attention to whether the falls are wrapping around the target (which can cause unintended pain), and adjust your technique if wrapping occurs frequently.
Finally, make sure the handle feels secure in your grip and does not slip during use.
This testing phase should take at least 10–15 minutes. It helps you fully understand the flogger’s characteristics and ensures it is safe and predictable before you use it on a person.
IMPORTANT
Never use a flogger (DIY or otherwise) on the face, head, neck, spine, kidneys, or joints! Start light, communicate constantly, and stop immediately if anything feels off.
If your finished flogger feels too stingy, you can easily fix it by adding more falls or switching to a thicker rope to shift the balance toward a heavier thud. If the flogger feels too heavy or floppy during swings, shorten the falls or add a stiffer core rod inside the handle for better control and stability. Uneven falls are simple to correct — just lay the flogger flat on a surface, re-trim all the tails to the same length, and reseal the ends. If the handle feels too thin or uncomfortable in your grip, add extra wrapping layers until it fills your hand properly.
Troubleshooting Common Problems When Making DIY Floggers
- Uneven falls – Lay the flogger flat and carefully trim all strands to the same length. Always measure twice before cutting.
- Floppy or weak handle – Wrap tighter, add more layers, or insert a wooden dowel/metal rod as a core. Use constrictor knots at both ends of the wrap.
- Fraying ends – Melt synthetic tips more thoroughly or tie double overhand knots closer to the ends.
- Loose wraps or slipping – Use fabric glue under the wrap, pull much tighter while wrapping, or switch to paracord inner strands instead of tape.
- Falls pulling out – Make sure the initial bundle is folded tightly over the ring and the first few wraps are extremely secure.
- Too noisy or stiff – Loosen the handle wrap slightly or choose softer rope.
Most issues are fixed with tighter wrapping, better trimming, or small design tweaks.
How to Maintain and Clean Your Homemade BDSM Flogger
- Synthetic rope/paracord/biothane: Wash with warm soapy water, rinse thoroughly, and hang to dry. They are fully washable and hygienic.
- Leather or suede: Wipe with a damp cloth. Condition occasionally with leather balm. Avoid soaking natural leather.
- General cleaning: Clean after any skin contact or fluid exposure. For heavy use, disinfect with a 10% alcohol solution (test on a small area first).
- Storage tips: Hang by the ring or loop in a cool, dry place. Avoid direct sunlight. Use a breathable bag or hook to prevent crushing.
- When to retire a flogger: Replace when falls become badly frayed, the handle loosens, or the material shows significant wear. Never use a damaged flogger.
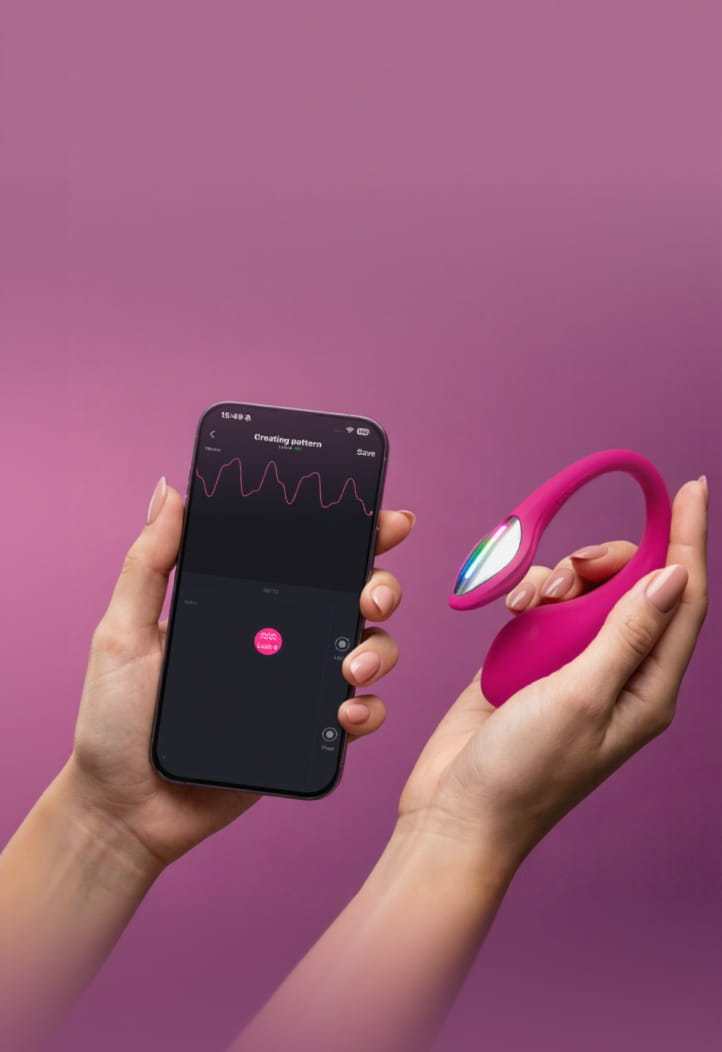
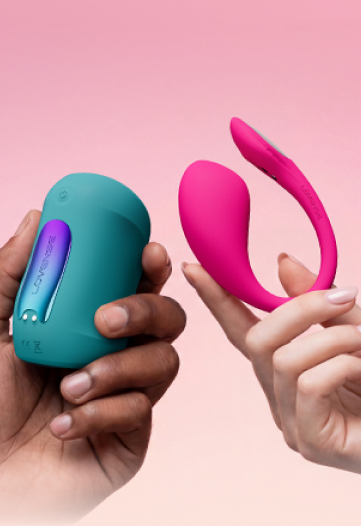
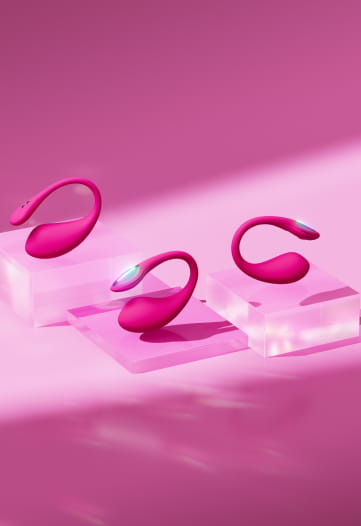
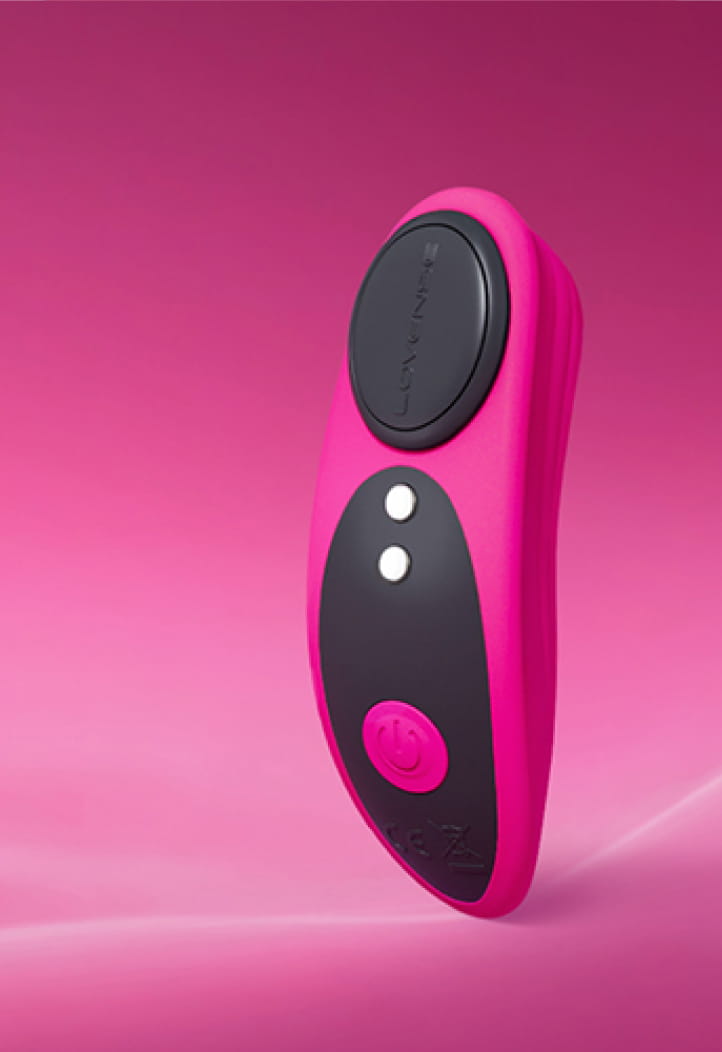
Add some vibrations to your flogging session
Domi 2 – Wand Massager
- Compact but powerful – with powerful vibration
- Ideal for intense punishment or reward sessions
- Full control via the Lovense app
- Flexible neck for comfort
Gemini – Vibrating Nipple Clamp
- Compact and wearable – Ideal for public play
- Remote-controlled vibration & intensities
- Adjustable pinch strength for comfort
- Triggers Full-body arousal
FAQs About How to Make a DIY Flogger
Yes, but it will be lighter and stingier. Use it for multi-strand falls or if you want a sharper sensation.
550 paracord is the most popular. It’s strong, colorful, and easy to work with. Use gutted (without inner strands) for softer falls.
25–40+ falls usually gives a nice heavy thud. Combine with thicker rope or leather for best results.
Yes, when using proper synthetics, secure construction, and thorough testing. Always test on a pillow first.
16–24 inches is ideal for most people. Adjust based on your play space and arm length.
Not for beginner rope floggers. A tight wrap is usually enough. Add a dowel for stiffer, more advanced builds.
Use more falls, softer materials (deerskin/suede), or unravel the ends of synthetic rope slightly.
Absolutely. Mixing creates unique sensations and is a great way to customize.
Final Thoughts
Remember that everything in this guide (the materials, fall counts, widths, and recommendations) are general starting points, not strict rules.
People are very different when it comes to sensation. What feels like a light, pleasant thud to one person might feel surprisingly intense to another. Some people love soft, gentle materials and find heavier ones too much, while others find light floggers almost ticklish and crave the deeper impact of heavier rope or leather.
What you have now is a solid foundation to point you in the right direction, but the real learning happens through your own experimentation. Try different styles, pay attention to what feels good (for both you and your partner), and adjust as you go.
Enjoy the journey — building and playing with your own floggers is part of the fun.
Want More DIY Reads?
- How to Make a DIY Vibrator Safely: Creative Ideas, Tips, and Upgrading
- Safe DIY Clit Toys – Guide to Feeling on a Budget
- DIY Cock Rings: Boost Your Stamina Without Breaking the Bank
- From Towel to Toy: DIY Pocket Pussy Ideas for Low-Cost Orgasms
- DIY Nipple Clamps: 7 Surprisingly Safe Ways to Get Your Pinch On